
Send Targeted Emails with Mailchimp Goal

Have you ever looked at a product on Amazon and then that product followed you all around the internet? This highly targeted form of advertising works because Amazon place cookies on your computer that lets them serve ads on other websites. Amazon is targeting you based on your interests.
You can use MailChimp in a similar way, but by sending targeted emails instead of serving targeted ads. Targeting your audience increases engagement, sales and conversions.
Mailchimp has a tool (for paid account holders, sorry freeloaders) that lets you add basic HTML code to your website that allows you to see what other pages your subscribers are visiting. MailChimp then lets you setup email auto-responders using that information. This lets you target your subscribers and send them emails with articles they may be interested in.
Instead of sending an article about Twitter to everyone in my list, I can send it to only those who have visited an article about Twitter in the past. The auto-responder lets you schedule emails as these actions happen.
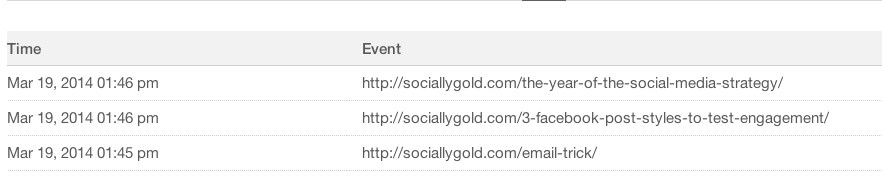
The above image is an example of the pages one of my subscribers visited after opening a recent email.
How can you use this?
When someone visits a page (or a page with a keyword) that you pre-designate, you can send them an automated email suggesting other similar articles. This user visited a post about Facebook posting, so I am inclined to send him/her more articles about Facebook.
Your subscribers will only receive your goal based automated email once, so they won’t receive the same email multiple times. You can setup multiple goals, but if you go crazy with it, you may annoy your people.
You can also create segments manually if you would like to send one off emails instead. Scroll down to see how to manually create segments.
How do you set up Mail Chimp Goal?
This is how you send targeted emails.
Step 1: Login to your MailChimp account
Step 2: Click on your username>account settings
Step 3: Click Extras>Integrations
Step 4: Scroll down and click enable next to Goal
Step 5: To track subscriber activity on your site, you’ll need to add the provided tracking code to your site’s template. I added mine in the header.php file at the very bottom.
Step 6: Now that your code is added, you need to enable Goal Tracking on each campaign before you send it. When designing an email, in the setup tab, click on Tracking and then click the Goal Tracking check box. Then, design your email as normal.
Now that you have your tracking code installed on your website and enabled on your campaign, you’ll need to send the email to start recording your subscriber activity. Once your subscribers start browsing your website, you’ll be able to create goal based emails.
How to manually create segmented lists with MailChimp
You don’t have to create auto-responders. You can also create segments of your list based on what URLs your people are navigating to from your email.
Step 1: Login to your MailChimp account
Step 2: Click lists and the name of the list you would like to segment
Step 3: Click the segment drop down and then the +New Segment Button
Step 4: Change Date Added to Goal Activity
Step 5: Select your segment paramaters
You can enter a specific URL, or you can enter keywords to create your segment. Keywords would be any word appearing in your URLs. You can hit the preview segment button to see how many subscribers will be in your segmented list. The list will continue to dump people into this segment as they take action.
Step 6: If you are happy with your segment, hit Save. Now your segment will be available in the list section when you send your email.
Creating Auto-Responders with Mail Chimp.
Auto-responders is a feature only available to paid account holders.
Step 1: Once you are logged in, click Auto-Responders
Step 2: Click Create Auto-Responder at the top right
Step 3: You can either send to a segment you already created, goal based or not, or you can create a new segment in this screen. Click New Segment and refer to steps 1-5 above to create your goal based segment. You’ll need to have your Goal tracking code installed to utilize goal based auto-responders.
You can also create auto-responders based on subscriber activity within your emails and by campaign. Goal based auto-responders are sent based on activity on your website and not your emails.
Sending targeted emails
Sending targeted emails using MailChimp Goal is a great email strategy to test. In my case, I’m going to create a Goal to track anyone who lands on a page with “strategy” in the URL.
Then, I’m going to setup an auto-responder to send an email 24 hours later advertising my social media training webinar. This will replace me having to send one off emails advertising my training to my entire list.
Remember, this feature is only available to paid users of MailChimp.
[Tweet “If you are a non-profit, you can purchase @MailChimp for a 15% discount. Tip via @socially_gold http://kb.mailchimp.com/article/do-you-offer-non-profit-discounts?t=1395272801&v=285&enc=bf21e4e60a47591d449a0d9399a1a4ce6a911fb43252daea96f799408f17c14a”]How well does this work?
I am in the process of testing MailChimp Goal based auto-responders. I’ll update this post with my findings. If you enjoyed this post and would like more posts just like it, you can subscribe to receive more right in your inbox.