Facebook Privacy Settings You Can’t Ignore
;
In this post I’ll explain how to adjust your Facebook Privacy Settings to post a status update that not all of your friends will see. You can segment your friends into lists, which makes it easy to hide posts.
When I worked for Hillel International: The Foundation for Jewish Campus Life, I used my personal Facebook Page to reach out to students. I was very careful as to what my privacy settings were before friending those that I was going to be working with.
So you want to post about an upcoming Shabbat Dinner but you don’t want your friends to see it. Well, you are in luck! There is a way to organize your friends into lists so certain posts can go to certain people.
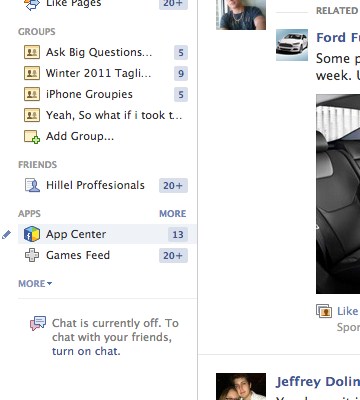
Step 1: Set up your friends lists. While in your newsfeed, on the bottom left of your screen, hover over “Friends” and click “more” to the right.
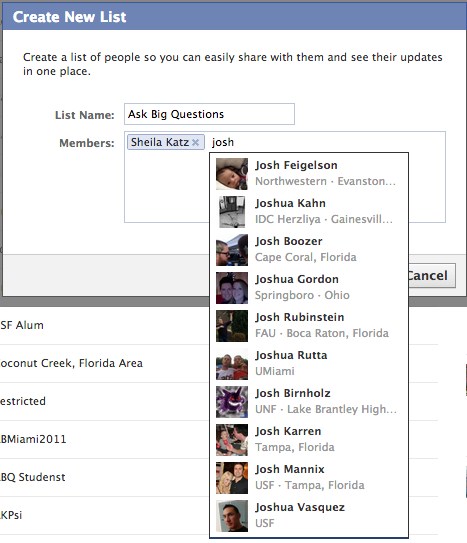
Step 2: Click “create new” and a Facebook pop-up will appear that asks you to name the list and pick those who you want in it.
Step 3: Click “Save” after you have added all your friends that you want to include in that list. Below I will explain how to choose the list you just set up so your post will only be seen by those people.
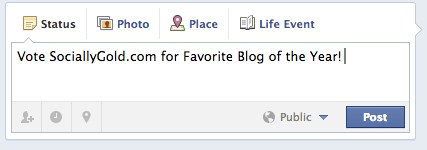
The default setting is set to Public, so all your friends will your posts.
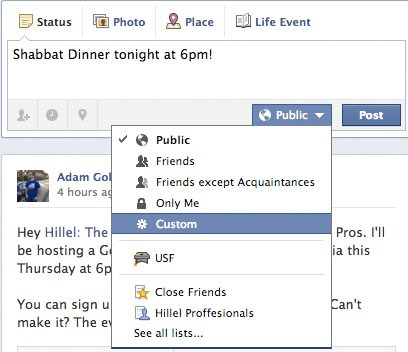
The globe, and “Public” with a down arrow is a drop down menu. If I were to post this, it would be eligible to be seen by all my friends. If i want to want to segment my post, below are the steps to do just that. In this example, I use a different list that I already created.
A status about Shabbat Dinner wouldn’t interest my friends from college or high school, so I want to exclude them from seeing it. This trick comes in handy so you don’t annoy your friends with irrelevant posts about work.
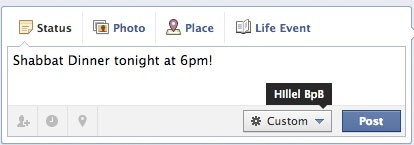
Step 1: Compose your status.
Step 2: Click the down arrow and select “Custom”
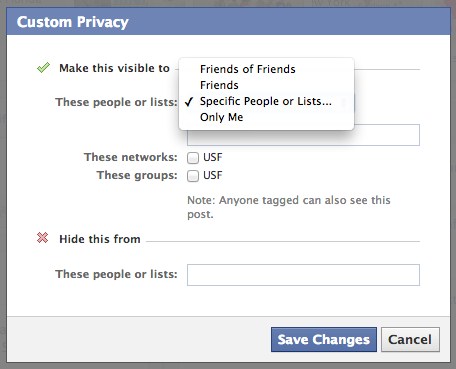
Step 3: Once you click custom, it will bring up the Custom Privacy settings window. This is where the lists you have created will populate.
Step 4: Click on “Specific People or Lists…”, which will enable you to pick individuals or lists you have previously set up.
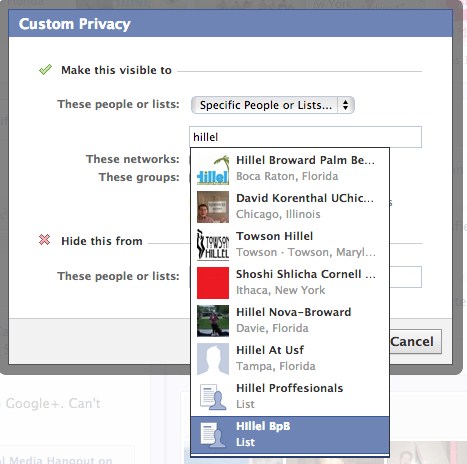
Step 5: Choose any list you have set up or pick individuals. Once you start typing, lists and names should populate.
Step 6: Hit “Save changes” and you are good to go. Your status will only be seen by that select group of people.
Step 7: Double check that your status will be seen by the people you want before you post. You can hover over “custom” and Facebook will show you who you are broadcasting to.
Keep in mind that this will remain the default setting until you change it back to public or another list. It will even translate to mobile.
Congrats! Now you can publish posts to specific groups of people on Facebook.
Did you find this useful? Let us know in the comments.

